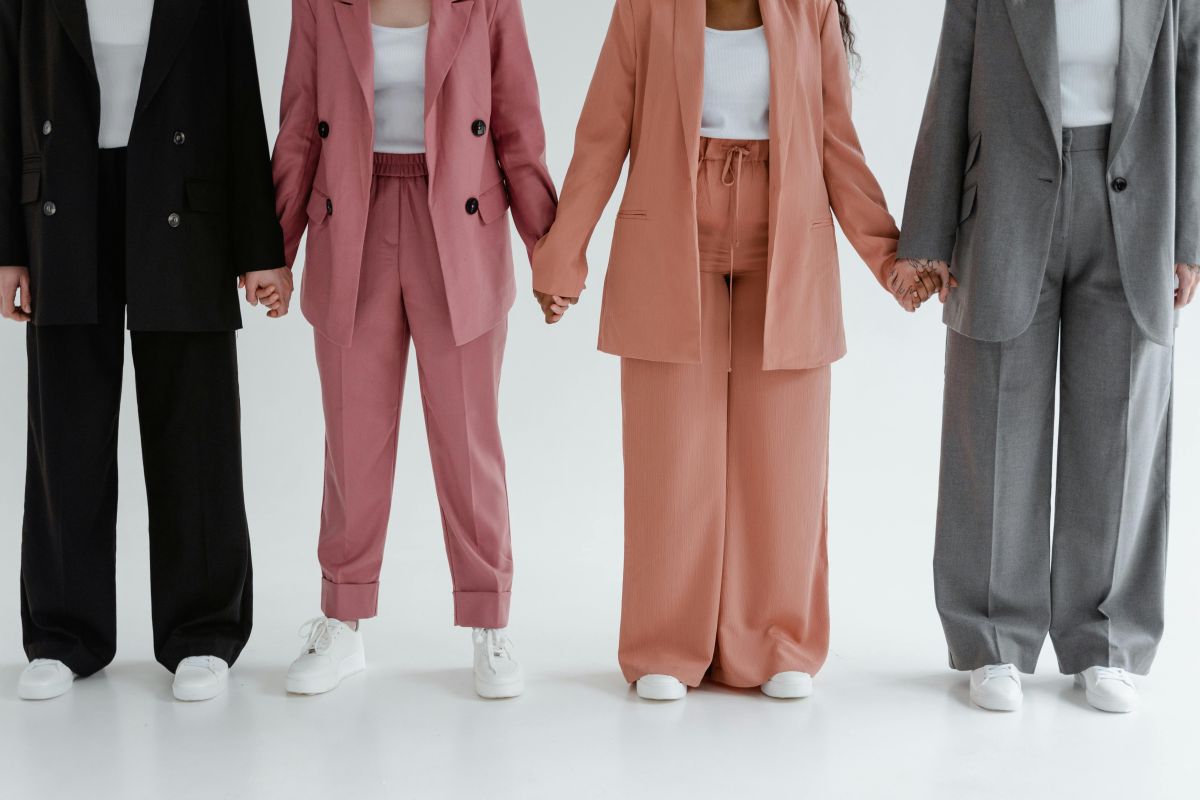
Trail Camera Tips: Great Way To Learn About The Habits Of Animals

What are the benefits of using a trail camera when crossbow hunting?

Have you ever considered using a trail camera while hunting? If not, you should! There are several benefits of using a trail camera when crossbow hunting. By following the Trail Camera Tips, you can get some great pictures.

First, it can help you scout an area and pattern game. This is especially helpful if you are hunting a new area or trying to locate a specific animal.

Second, a trail camera can help you determine what time of day animals are active in an area, which can help you plan your hunts accordingly.

Third, a trail camera can provide you with valuable information about animal behavior, which can help you be a more successful hunter.

Finally, a trail camera can be a fun and exciting way to enjoy hunting even when you are not actually in the field. TrailĀ cameras are a great way to scoutĀ for games, track game movements, and pattern games. By placing a trail camera at strategic locations on your hunting property, you can get a much better idea of the game that is using the area, when they are using it, and how to best hunt them.

Placing a trail camera can also help you determine what time of day animals are active, which can be critical to planning your hunts. In addition, a trail camera can provide you with valuable information about an animal’s behavior. Understanding animal behavior is key to being a successful hunter. Not only can using a trail camera be helpful, but it can also be a fun and exciting way to enjoy hunting. Watching footage of animals in their natural habitat can be a truly fascinating experience. So, if you’re looking to improve your hunting success, using a trail camera is a great way to do it. Give it a try and see for yourself!

Trail Camera Tips

What are some tips for choosing the right trail camera

Choosing the best trail camera for your next hunting trip can be a daunting task. With so many different brands and models on the market, it is difficult to know which one is right for you. But if you take the time to consider the camera’s trigger speed, photo resolution, battery life, and memory capacity, you will be able to narrow down your choices and find the perfect camera for your needs.

Trigger speed is important for capturing fast-moving subjects, such as deer. A faster trigger speed means that you are more likely to get clear photos of your target. Photo resolution is also important for getting clear photos. A higher resolution means that you can zoom in on the photo and still see details. Battery life is important for leaving the camera in the woods for long periods of time. Some trail cameras can run for months on a single set of batteries. Memory capacity is also important for storing more photos and videos. SD cards come in various sizes, so make sure to choose one that is large enough for your needs.

Price is also a factor to consider when choosing a trail camera. A more expensive camera may have more features, but it is not always necessary to spend more money to get a good-quality camera. Do your research and compare the features of different trail cameras to find the best one for your needs.

Trail Camera Tips

How to set up a trail camera

Trail cameras can be a great asset for crossbow hunters, providing valuable information about game movement and patterns. By placing a camera in a strategic location, hunters can gain insight into when and where the game is most active. When selecting a spot for your trail camera, choose an area with fresh tracks, droppings, or other signs of game activity.

Once you have found the perfect location, clear away any leaves or debris that could obstruct the camera’s view. Position the camera at eye level, pointing slightly downward, and aim it at a likely travel route. Be sure to check your camera frequently, as batteries and memory cards can fill up quickly during busy periods of game activity. With a little patience and preparation, you’ll be able to capture that perfect shot of a deer crossing the path of your camera!

How to use a trail camera to find the best hunting spots

If you’re serious about crossbow hunting, then using a trail camera is a must. By placing a camera in strategic locations, you can get an idea of where the deer are congregating and plan your hunts accordingly. Here are some tips for using a trail camera to find the best hunting spots.

  1. When choosing a location for your trail camera, look for areas that are likely to attract deer. Good spots include feeding and watering areas, natural travel routes, and bedding areas.
  2. Pay attention to the direction the camera is pointing. You want to make sure that it is pointing in a direction that will allow you to get a clear view of the area you’re trying to monitor.
  3. Be sure to check your trail camera regularly. If you leave it in one spot for too long, you may miss out on valuable information.
  4. When you’re ready to go hunting, take your trail camera with you. This way, you can keep an eye on the game and make sure you’re in the right place at the right time.
  5. By following these tips, you can use a trail camera to find the best hunting spots and plan your hunts accordingly.

How to use a trail camera to help plan your crossbow hunting strategy

If you’re an avid crossbow hunter, then you know that having a good game plan is key to a successful hunt. But what if there was a way to make your game plan even better? Enter the trail camera. A trail camera can be a great tool to help you plan your crossbow-hunting strategy. By setting up a camera in a good hunting spot, you can get an idea of the best times to hunt and what type of crossbow will work best. Here are a few tips for using a trail camera to help plan your next crossbow hunt:

  1. Choose a good spot for your camera. You’ll want to pick a spot where you’ll get a good view of the game you’re hoping to hunt.
  2. Set the camera to take pictures at the right time of day. This will help you determine when the game is most active.
  3. Check the pictures regularly. This will help you see what’s happening in the area you’re planning to hunt.

By following these tips, you can use a trail camera to help you plan your next crossbow hunt and up your chances of success.

Tips for using a trail camera to get the most out of your crossbow hunting experience

Trail cameras are a great way to learn about the habits of game animals. By properly positioning your camera and using the right settings, you can take some great pictures. Using bait can also attract the game to your camera.

Reviewing the pictures regularly will help you learn about the animals in your area. One important thing to remember when using a trail camera is to make sure the flash is turned off. A camera flash can spook the game, making it harder to get good pictures. Here are some tips for getting the most out of your trail camera:

  1. Make sure your camera is properly positioned.
  2. Make sure the camera is set to the correct settings.
  3. Use the right type of bait.
  4. Take multiple pictures.
  5. Review the pictures regularly.

By following these tips, you can get some great pictures that will help you learn about the game in your area.

Trail Camera Tips

How to troubleshoot common problems with trail

If you’re a crossbow hunter, chances are you’ve made use of a trail camera at some point. Trail cameras are a great way to get an up-close and personal look at the wildlife in your area. However, they can also be frustrating if they don’t work properly. If you’re having trouble with your trail camera, don’t despair! In most cases, the problem can be easily fixed with a little troubleshooting. Here are some tips for troubleshooting common trail camera problems:

  1. Check the batteries. This is the first and most obvious step, but it’s also the most important. Make sure the batteries are fresh and properly installed.
  2. Check the SD card. If the camera is not writing to the SD card, try formatting the card or using a different card.
  3. Check the camera’s settings. Make sure the camera is set to take photos or videos, and that the photo/video quality is set to a high enough resolution.
  4. Check the camera’s location. Make sure the camera is not pointing at the sun, and that it is not obstructed by branches or other objects.
  5. Check for physical damage. If the camera has been dropped or otherwise physically damaged, it may need to be replaced.

If you follow these tips and still can’t get your trail camera to work properly, you may need to consult the camera’s manual or contact the manufacturer for further assistance. With a little troubleshooting, you should be able to get your trail camera up and running in no time. Happy hunting!

Leave a Comment